

How To Add Hover Zoom To Website
Wondering how to add image hover effects in WordPress? When designing your website, you'll want it to stand up out as much as possible. This can be difficult, because every other spider web developer is thinking the aforementioned thing. Yet, many innovative tools enable you to create eye-communicable web designs with ease.
For instance, adding hover effects to images can exist a creative, interactive mode to improve static images on your site. In this post, we'll discuss the benefits of adding hover effects to an image in WordPress. Then we'll requite you a step-past-step guide on how to implement them on your website. Allow'south get started!
What Are Epitome Hover Effects in WordPresss?
Since WordPress is very customizable, yous can pattern a website with a lot of visual appeal. It may take time and planning to create a unique site, but it's very possible when you're using the right techniques.
One way to be innovative with your web design is by adding a hover issue to an image. Hover effects can be a perfect mode to build an aesthetic, memorable website. They can help simple static images stand up out and experience more interactive:

A hover upshot is an blitheness that triggers when a user hovers over an chemical element on the page. Some hover effects are equally simple as enlarging an epitome. Others might change the color or make the image shrink or rotate. Hover furnishings can too be added to many other elements, such every bit links on your landing pages, just in this mail we'll focus exclusively on images.
Why You Might Want to Add Hover Effects to Images in WordPress
If yous want to abound your business, information technology'due south crucial to take a well-designed website. Calculation images is a smart technique for breaking up long passages of text and making your site feel personal. Although static images tin be effective, using hover effects can be more eye-catching and unique.
There are many benefits to using hover effects. They can:
- Add an interactive chemical element to the paradigm
- Exist more than attention-grabbing than a static image
- Require less resources than GIFs or videos
- Permit users know that an image is clickable
Best of all, with our Beaver Builder plugin, hover furnishings are easy to use. You'll detect that Beaver Builder offers many different animation options for hover furnishings. By using a custom class and custom CSS, yous can instantly improve the images on your website.
How to Add Hover Effects to Images in WordPress (In 4 Steps)
Now that nosotros've explored the benefits of hover effects, you might exist wondering how to use them. Fortunately, nosotros've compiled a step-by-pace tutorial on this process:
You can add together hover effects via transmission coding. Withal, this can exist both risky and time-consuming, especially if y'all're not an experienced developer. The good news is that this task becomes much simpler when you're using a plugin.
The free Beaver Builder WordPress plugin helps y'all build functional and visually-appealing WordPress websites with ease. Every element is developer-friendly, from the drag-and-drop page builder to the customizable CSS. Plus, this tool allows anyone to easily use prototype hover effects. For any photo that needs a more interactive characteristic, y'all tin't go wrong with Beaver Builder.
Nosotros also recommend installing our Beaver Builder Theme. When designing posts and pages in WordPress, it's best to use time-saving WordPress post templates. That fashion, yous tin focus on creating interesting features such as hover effects, rather than designing layouts. However, you're free to use Beaver Builder aslope whatsoever WordPress theme you adopt.
Step 1: Add a Photo Module to Your Page
Before you begin, be sure to install and activate the Beaver Builder plugin. After that, on the dorsum end of your WordPress website, go to the Pages tab. Either create a new page or select the page you want to edit, and click Launch Beaver Architect to open up the editor.
Then click on the + icon in the upper correct-manus corner. There, you'll add a Photo module to your folio:
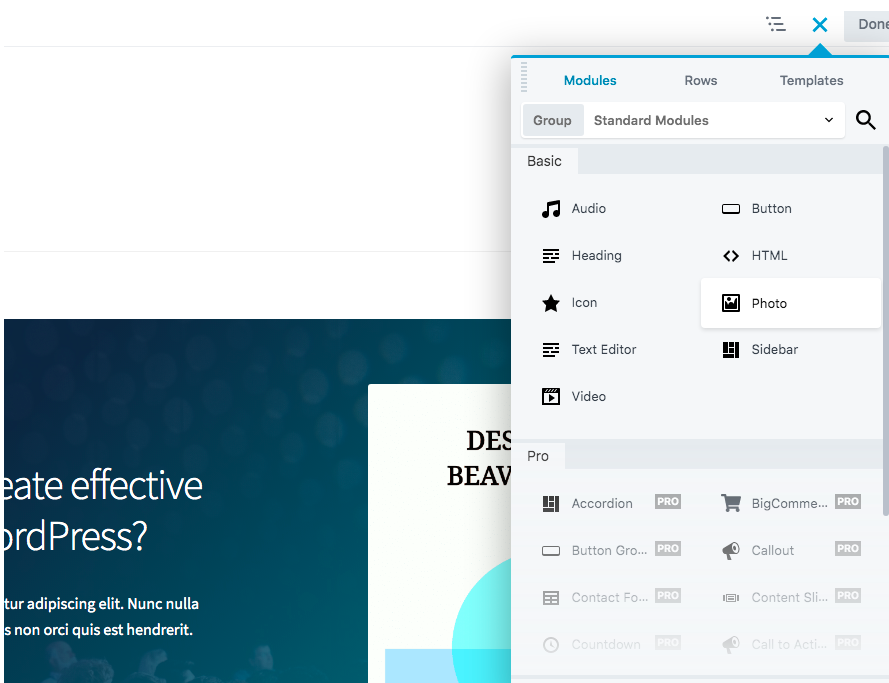
You can use the drag-and-drib characteristic to rapidly and easily place this module wherever it'southward needed.
Step 2: Configure the Photograph Module
Next, configure the Photograph module as you would for whatsoever image you lot add to your site. To brainstorm, you can either select a photo from your Media Library or use a URL. When using the Media Library, select the photo size you lot want:
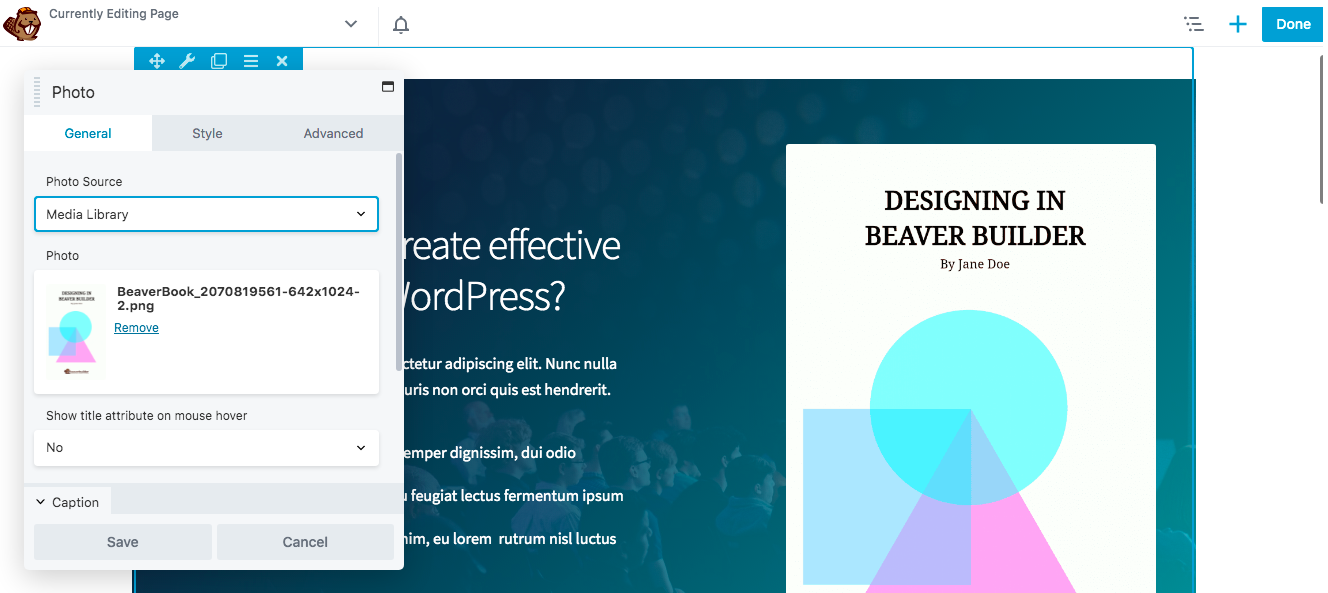
Yous tin can also crop the paradigm into various geometric shapes. A hover consequence will still be constructive fifty-fifty if your image is shaped into a landscape, panorama, portrait, or circle.
At this point, you tin can add together a link to the photo if needed. Because hover effects describe attending to an paradigm, this may be an constructive manner to encourage visitors to visit certain URLs.
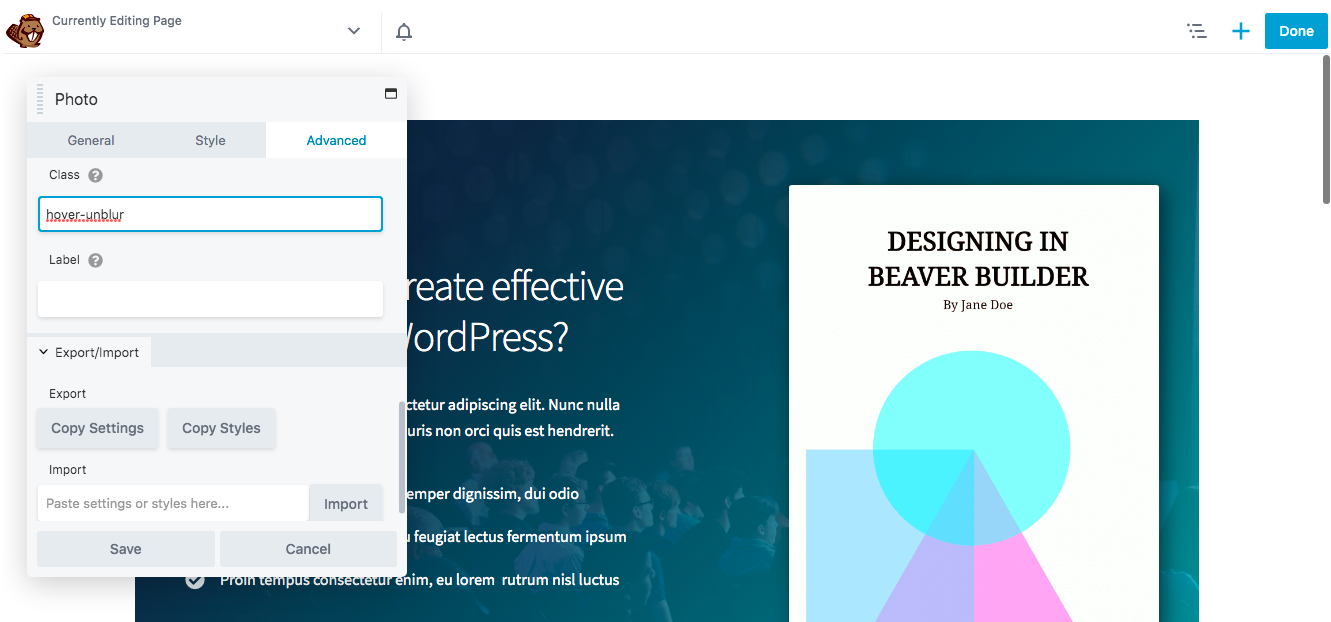
Step 3: Enter the Custom Form
Once y'all've configured the photo module to your liking, click on the Advanced tab. This is where you'll find the HTML Chemical element department.
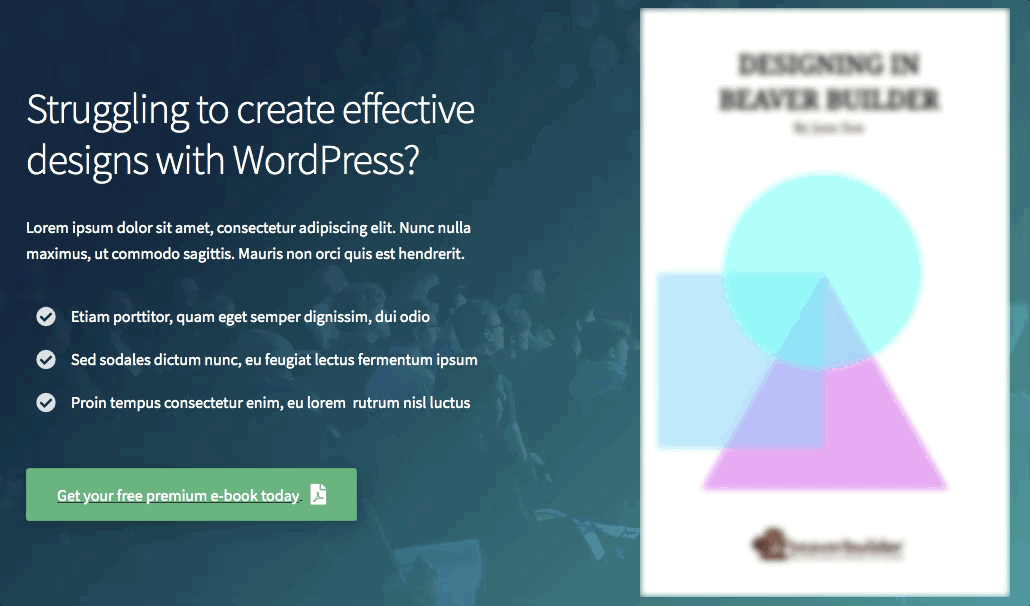
Coil to the bottom of that section, until you run into the Grade field. In this box, you'll enter the custom grade information for whichever upshot you're using. In this tutorial, nosotros're using the Hover Unblur consequence, so we entered "hover-unblur" in the grade section:
With hover effects, you can not only insert animations but as well change the color of an epitome. Beaver Builder offers many different hover furnishings to cull from.
Depending on the outcome y'all want to add, you'll need to use a specific custom class. Here are the options you accept available:
- Hover Zoom In: hover-zoom-in
- Hover Zoom Out: hover-zoom-out
- Hover Zoom Out and Rotate: hover-zoom-out-rotate
- Hover Unblur: hover-unblur
- Grayscale to Colour: gray-calibration-img
- Sepia to Color: sepia-img
Y'all can always preview diverse effects before choosing i, to see which selection is nearly effective.
Step 4: Add the CSS for the Outcome to Your Site
Finally, you'll need to add the CSS for your called hover issue to your site. To do this, yous tin can visit our knowledgebase to find and copy the CSS for that hover issue:
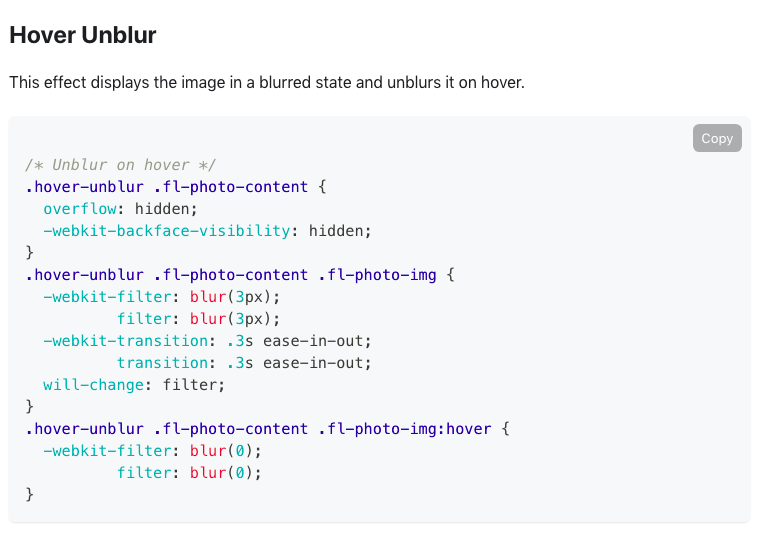
It'southward important to note that the transition speeds for hover furnishings are fixed at 0.3 seconds. Still, you can change this when you upload the CSS to your site. Simply increase or decrease the values to speed up or slow down the transition.
To add the CSS code to your website, click on the title bar in the upper-left corner and navigate to the Global Settings:
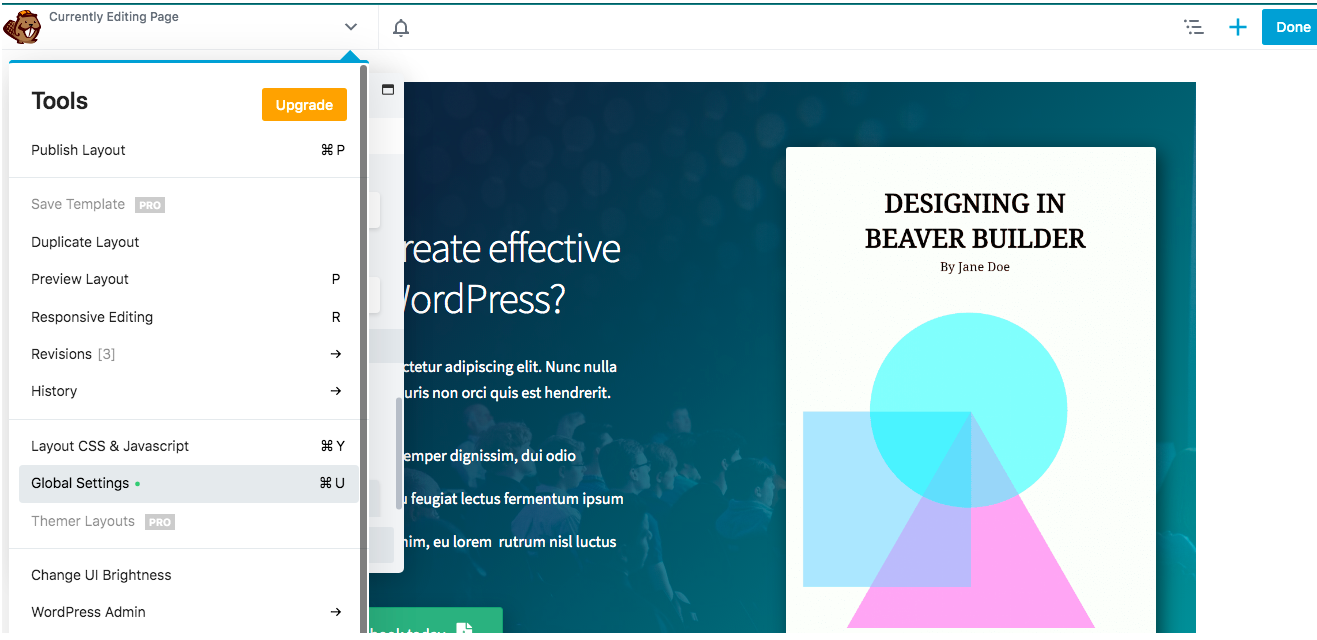
Then go to the CSS tag, and paste in the CSS code for your desired effect. Once you save your changes, this lawmaking will appear in Tools > Global Settings on every Beaver Builder page. What'south more, your CSS rules volition apply to all of your site'southward content, even the parts not built using Beaver Builder.
If you lot'd like to utilise the CSS to just a specific page, go to Layout CSS & Javascript instead. Enter your code into the CSS tab, and save your changes.
Now you lot can view your kickoff hover outcome! Exist certain to hover your mouse over the paradigm to brand certain it'south working correctly:
You can also add the same hover consequence to multiple images in a row or column. For more details on that, check out our documentation on working with row and column settings.
Decision
Although there are many ways to customize your website, adding a hover effect is a quick and easy way to make any image look unique and centre-catching. Hover effects as well offer an interactive element that can keep people on your website for a longer period of fourth dimension.
As we've seen, yous can hands add any hover effect using our Beaver Builder plugin, by post-obit these steps:
- Add a photo module to your folio.
- Configure the photo module.
- Enter the custom class.
- Add the CSS for the upshot to your site.
What'due south your favorite hover effect to use? Let us know in the comments section below!
![]()

How To Add Hover Zoom To Website,
Source: https://www.wpbeaverbuilder.com/image-hover-effects/
Posted by: kelleyandon1984.blogspot.com
0 Response to "How To Add Hover Zoom To Website"
Post a Comment